When your target of opportunity knocks, you need to answer in seconds.
Greg was as enthusiastic as an 8-year-old on Christmas morning. His first pronghorn hunt! He had a new .257 Weatherby Magnum with a Zeiss scope that could shoot a country mile. Back home on the bench, he was punching sub-MOA groups with 115-grain Barnes Tipped Triple Shocks.
Now the buck of his sweet dreams was emerging from a grassy swale — first the deeply hooked tips, then long, jutting prongs supported by broad, fat bases.
“That’s a great buck,” his guide said. “Shoot him.”
The guide kept his eyes glued to the binocular to see the hit. But it didn’t come. Seconds ticked by. The buck began prancing nervously, stopped broadside and looked back.
“Take him now. Perfect broadside shot,” the guide said. Nothing. He glanced over to see Greg put away his rangefinder and begin fiddling with his scope’s magnification ring.
“No need for that. He’s inside 250 yards. Just shoot him.”
“I wanna crank the power up to 12x.”
The guide waited patiently. The pronghorn didn’t, trotting out to 280 yards, still dead-on range for the .257. And still Greg didn’t shoot. He had folded out his bipod legs and lain prone. In his scope, he saw what the guide knew he’d see: grass. Nothing but grass. He sat back up and tried to pull the bipod legs out farther.
“Forget it,” the guide said. “He’s gone.”
Guides hate this kind of stuff, but it happens all too often. Hunters, many of them darn good shots at home, waste too much time playing with their gear when they should be shooting.
 KISS — The Key to the Kingdom
The key to being an effective field shot is assuming the steadiest shooting position as quickly possible and firing at the first good opportunity. You may literally have hours to accomplish this after you’ve crawled within range of a bedded animal, but more often game will be moving and you’ll have mere seconds — not enough time to indulge in excessive mental and mechanical gymnastics. So the first rule of shooting game is a familiar one: Keep It Simple, Stupid.
Alas, KISS is anathema in today’s sniper climate. Manufacturers (and increasingly those of us who buy their wares) are all about complication. First you buy a heavy, long-barreled magnum rifle capable of shooting MOA to the dark side of the moon. If you really want to be cutting edge and impress your friends, you get one with a thumbhole stock, vertical pistol grip, adjustable comb and butt, beavertail fore-end, attached fore-end bipod, butt monopod and enough Picatinny rails to mount the 7th Cavalry.
Ideally, you scope this platform with a 6-24x50mm, 30mm main tube scope with side-focus parallax adjustment, high-profile turret knobs and BDC reticle with 27 sub-reticles, 10 windage reticles and a milradian scale on the upper vertical bar.
To properly use this precision instrument, you’ll need to invest in a laser rangefinder rated for 2,000 yards with built-in inclinometer, brush mode, scan mode, first target mode, last target mode, archery mode, four rifle modes, temperature compensation mode, automatic altitude adjust, barometer, digital compass and iTunes compatibility.
Because wind is often a factor in long-range shooting, you’ll also need an anemometer for measuring its velocity.
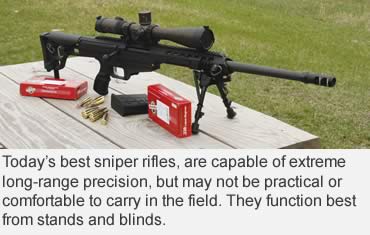 Finally, you’ll need to tape a trajectory table to your buttstock or carry your Smartphone on which you’ve loaded compatible ballistics software. You may employ your phone’s digital calculator or carry a separate hand calculator for converting milradians to MOAs or factoring cosines.
But that’s it! That’s all you need.
Need I describe what happens in the heat of the action?
Just last night I watched a hunter on TV employ much of the above equipment to shoot several yards over a kudu. Despite plenty of time, all the technology at his disposal and two companions to help with the calculations, the hunter got confused, dialed too much correction into his super scope and blew the shot.
I know another hunter who, using an ordinary rifle with a basic crosshair reticle and no turret dialing, collected five kudu with five shots.
This doesn’t mean sniper technology is not useful. In the right hands at the right time, it can enable shots hunters would never attempt with traditional rifles and scopes. Human nature, however, indicates a simpler approach may be better for most of us.
If your math is a bit fuzzy at the best of times, if you tend to breathe harder and shake slightly at the sight of a big buck, if you sometimes can’t remember where you left your keys or how to program your cell phone, your field shooting might improve by simplifying your technique.
 Less is Best
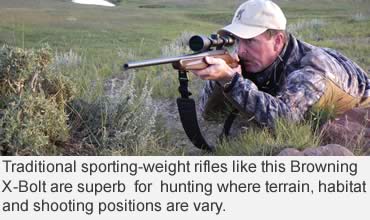
Pare down the technology. A trim, light rifle weighing under 8 pounds should both enable and encourage you to stay afield longer and hike farther. That’s often key to finding game. The old-fashioned rifle configurations of the 1960s make carrying and operating a rifle pleasant and practicable, too.
While sniper stocks maximize stability on a bench, they interfere with carrying and swinging into action. An open grip lets you carry a rifle over your shoulder at the ready. Your thumb will lie close to the safety to flick it off in an instant without having to pull your thumb out of the thumbhole, swing it around the top, find and push the safety, then swing it back into the thumbhole. A slim fore-end rides comfortably in your hand. A shorter barrel swings faster and catches less brush. A smaller scope aligns more easily with your eye and overall lighter weight helps you raise, swing and shoot quickly. Yet, when you kneel, sit or lie prone, such a rifle settles down more than adequately for the odd long shot.
If you plan to hide in a blind 24/7, a bulky, heavy, complicated sniper-style rifle could be perfect. That’s what Sendero rifles were designed for — precision shooting under controlled conditions. But if you’ll be walking, hiking, climbing and moving from forest cover to open canyons and grasslands, a traditional sporter-weight rifle should prove more effective.
Aiming and Ranging Simplified
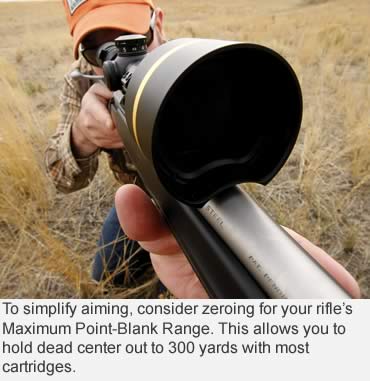
To simplify aiming, consider zeroing for your rifle’s Maximum Point-Blank Range (MPBR). This is the distance over which you can aim dead center on the vitals and hit them. It can stretch from the muzzle to 300, 350 even 400 yards with some rifles/bullets/velocities.
MPBR works by zeroing your rifle to shoot about 2 to 3 inches high at 100 yards. This varies by muzzle velocity and your bullet’s ballistic coefficient (BC). The higher the velocity and BC numbers, the farther the bullet will fly before falling out of the vital zone.
Imagine aiming/shooting down the center of a pipe that is the diameter of your game’s vital chest. On a whitetail, this is roughly 10 or 12 inches. Let’s go with 10 inches to be safe. Instead of zeroing your rifle for 100 yards, zero it for 250, 270, even 300 yards. This means it will shoot 3 to 5 inches high at about 170 to 190 yards, not quite high enough to hit the top of the pipe or the top edge of your target’s vital zone. The bullet then drops gradually, but should remain high enough to stay in that vital zone out to the far edge of its MPBR.
This allows you to hold dead-center on any deer-sized game out to at least 300 yards with most modern bottlenecked cartridges. There’s no need to turn turrets, select from a confusing array of reticles or even use a rangefinder. Just hold dead center and shoot.
Of course, if you have the time, you can employ the laser, but when seconds count and you’re pretty sure your game is within 300 yards or so, you can launch most shots with confidence. And most hunting shots do come inside of 300 yards.
This assumes that your rifle is accurate. If it regularly places bullets into an inch at 100 yards, it could toss one an inch higher than point of aim at 200 yards and 1 1/2 inches high at 300 yards. You might also pull a shot an inch or two off point of aim. To minimize this, you might want to zero no more than 3 or 4 inches high at that 170- to 190-yard midrange.
You can still use turret dialing and multi-reticles for longer-range shooting, but you won’t need to fool with it unless game is at 400 yards or farther. This means two or three sub-reticles or dialing a few MOAs will suffice.
 Practice Real Field Positions
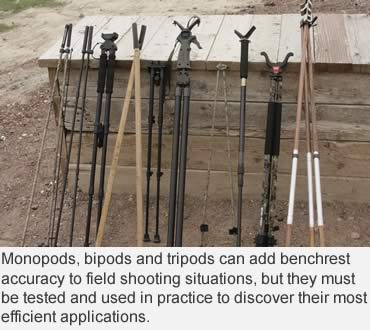
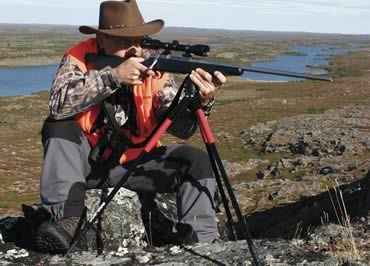
Sure, prone is the steadiest position, but sitting and kneeling are more versatile. They get your muzzle above most rocks and brush, let you swivel to follow moving targets, and are usually faster to assume. Combined with a handheld bipod or tripod, plus a pack under your trigger arm, sitting can be nearly as steady as a benchrest.
Carry shock-corded bipod sticks in your belt or a tripod as a walking stick. These keep weight off your rifle and maintain its quick handling balance. Practice setting up these sticks and sitting properly, quickly — over and over again at the range.
Once you know your rifle/load is accurate, it’s crucial to begin training to be accurate from field positions.
Anticipate using natural rests, too — posts, trees and boulders, and also little rises of ground and cut banks.
Get out before the season and try them all. Practice shooting from classic sitting positions without any rests. Expert sitting shooters can nail a 10-inch plate at 300 yards nearly every time. This could be you. But you have to practice until it becomes second nature. You don’t want to be wiggling from one uncomfortable position to another with a buck in the balance.
Don’t fret about “wasting” ammo. Would you rather spend money on practice ammo, or miss?
While practicing, mimic real hunting situations as much as possible. Set targets in hunting country and hike through it, taking shots as they appear from unknown distances. Square cardboard boxes are good because they show a sizeable target from all sides. Balloons on thin stakes explode to show hits. Photo-realistic animal targets are good for teaching where to aim.
 Keep Score
In practice, try first for accuracy and then speed after you discover your best techniques for setting up smoothly. Imagine your target is a deer ready to bolt. How quickly can you get off a lethal shot?
Note where your bullets hit and analyze why. If you’re not flinching, you should be able to call your shots. See where the crosshair is when the shot breaks, then say to yourself, “That went left” or “I pulled that one low.” Call those shots, and then check the target to corroborate.
If you suspect flinching, have a partner load your rifle, or pretend to load it, when you’re not looking. Drop the hammer on an empty chamber, and you’ll know if you’ve flinched. The crosswire should remain steady throughout the trigger engagement.
As you hunt, note the terrain and which shooting position would be best there. That way, when your target of opportunity knocks, you’ll be able to answer in seconds. No more fiddling, no more plopping into too-tall grass. You’ll hunt and strike like the deadly hunter/shot you’ve become.
Read Recent GunHunter Articles:
• Sauer’s Elegant 303: The 303 is a masterpiece of metal machining.
• The .308 Family: Offspring of the .308 are accurate, compact and easy to shoot.
This article was first printed in the July 2011 edition of Buckmasters GunHunter Magazine. Subscribe today to have GunHunter delivered to your home.